Saturday, August 13, 2011

Welcome

Welcome to ICDoor. It is standing for I C (SEE) a Door, a door or a way or a path, which will guide you to your glory and to your goal. Our main goal is to make our country people self independent. ICDoor’s dream is to full fill all the dreams that you are dreaming. For that we are working.
ICDoor’s vision is to make the country people self independent and in this 21st century computer is one and only weapon to fight against all odds. For that we are taking our weapon to you and teaching you what we know.  We are teaching you to be one man Army, and computer will be your one and only weapon.
To make sure that you get what you deserve, we have plenty of courses. For more details see ICDoor courses section. As we believe that there is always a shortcut, to get that shortcut see ICDoor Shortcut. To register online go ICDoor Online-registration. To be connected with us go to ICDoor Forum. To contact us go ICDoor contact. To do work with us or get a job go ICDoor Job. To learn more about us go ICDoor.
So come to ICDoor and grab your glory…


Director
ICDoor @ ChrImty

Friday, August 5, 2011

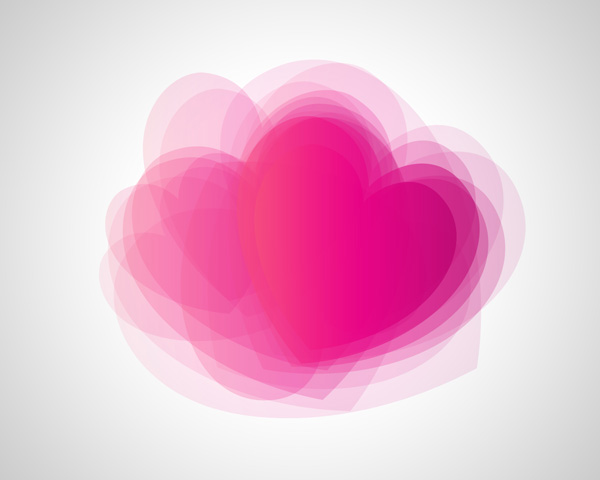
How to make a abstract Heart in Photoshop

Final Image Preview

How to create abstract Valentine's Day illustration with hearts in Photoshop CS5
Start working by creating a new document (Ctrl+N) in Adobe Photoshop CS5 with the size 1280px by 1024px (RGB color mode) at a resolution of 72 pixels/inch. Select the background layer in Layers panel and click on Add a layer style icon from bottom part of the Layers panel to select Gradient Overlay.
How to create abstract Valentine's Day illustration with hearts in Photoshop CS5
Click in the color bar to open the Gradient Editor and set the color stops as shown. Click OK to close the Gradient Editor dialog box.
How to create abstract Valentine's Day illustration with hearts in Photoshop CS5
We’ve got the next result:
How to create abstract Valentine's Day illustration with hearts in Photoshop CS5
Select the Custom Shape Tool (U)in the Tools bar, in the Options bar click the Shape to open the selection menu. Find Heart at the bottom of the menu, and then double-click a shape thumbnail to select it.
How to create abstract Valentine's Day illustration with hearts in Photoshop CS5
Click and drag to draw the heart shape. Then apply the Convert Point Tool to make the appropriate corrections on the heart’s shape.
How to create abstract Valentine's Day illustration with hearts in Photoshop CS5
Set Opacity to 10% for this layer and click on Add a layer style icon from bottom part of the Layers panel to select Gradient Overlay.
How to create abstract Valentine's Day illustration with hearts in Photoshop CS5
Click in the color bar to open the Gradient Editor and set the color stops as shown. Click OK to close the Gradient Editor dialog box.
How to create abstract Valentine's Day illustration with hearts in Photoshop CS5
We’ve got the next result:
How to create abstract Valentine's Day illustration with hearts in Photoshop CS5
Next we have to make some copies of the last made layer, increasing the Opacity value for each next copy and change the heart sizes with Free Transform (Ctrl+T) command.
How to create abstract Valentine's Day illustration with hearts in Photoshop CS5
Change the Opacity to 15% for the next copy:
How to create abstract Valentine's Day illustration with hearts in Photoshop CS5
Opacity is 10% for the next copy:
How to create abstract Valentine's Day illustration with hearts in Photoshop CS5
The next copy with Opacity to 10%.
How to create abstract Valentine's Day illustration with hearts in Photoshop CS5
Change the Opacity to 10% for the next copy:
How to create abstract Valentine's Day illustration with hearts in Photoshop CS5
This way we have to represent several copies as shown (Opacity - 10%).
How to create abstract Valentine's Day illustration with hearts in Photoshop CS5
The next copy has Opacity - 20%:
How to create abstract Valentine's Day illustration with hearts in Photoshop CS5
Also we have to represent several copies as shown with Opacity - 20%.
How to create abstract Valentine's Day illustration with hearts in Photoshop CS5
The next copy needs the Opacity - 30%:
How to create abstract Valentine's Day illustration with hearts in Photoshop CS5
One more heart with Opacity - 50%.
How to create abstract Valentine's Day illustration with hearts in Photoshop CS5
Next copy with Opacity - 70%.
How to create abstract Valentine's Day illustration with hearts in Photoshop CS5

Wednesday, August 3, 2011

Illustrated Look From a Photograph in photoshop


Before

Step One:

Create a new Solid Color Adjustment layer and fill it with White. Above that layer, create a new blank layer by hitting the New Layer Button at the bottom of the layer palette. Name that layer "Basic Shapes." Now turn both of those layers off.

Step Two:

We are going to use the Pen Tool (P) to trace all of the basic structural elements of the image. In my case, it will be the outline of the body and the outlines of the clothes.
With the Pen Tool selected, simply click anywhere you would like to start then continue to click and drag to trace the part you are working on with the path. To make it look more like a sketch, we are going to use a lot of small paths rather than trace the whole thing with one long path. When you come to a place where you think the path should end, hold down the Cmd (or Ctrl) key ,and click anywhere off the path. That will deselect it and now you are free to create another one. Keep doing this until all of your basic shapes are traced. Here are a few shots of how I traced my image:
A common misconception is that a path needs to be a loop. Not true. We are going to use all "open paths" in this tutorial.

Step Three:

Turn on your white layer and your blank layer. Select the blank layer. In the paths palette, drag your work path down to the New Path button at the bottom of the palette to save it. Select the Brush Tool and open the brushes palette. Select any round, hard brush preset. Under the Brush Tip Shape section, modify the brush to create a thin ellipse by bringing the roundness down to 12%. Make the angle 45 degrees. Turn on the Shape Dynamics section bring the Size Jitter to 100, the Minimum diameter to 35, and the Angle Jitter to 5.
With the blank layer still selected, hit D to make black your foreground color then right/control – click on the path and choose Stroke Path. Make sure that Simulate Pressure is checked and use Brush as your source. Hit OK. You might have to adjust the Master Diameter in the brushes palette if the lines are too thin or thick.

Repeat steps 2 and 3 a few more times, each time getting more and more detailed in what you trace. The more detail you trace, the thinner you should set the Master Diameter on the brushes palette. Each time you do a pass, make sure to apply the stroke onto a new layer.

Step Four:

Now that we have the outlines, let’s paint in some color. Duplicate the the layer that contains your photograph. Put the copy at the top, above all the other layers. Set the Blending Mode to "Color".
Hit B for the Brush Tool. In the Brushes palette set the Brush Angle to -45 degrees and turn off the Shape Dynamics. Make the brush a bit larger.
Make a new blank layer and call it "Paint." Make sure that it’s below all of your outline layers. Make sure that your foreground color is still set to black. In the properties bar, set the Opacity of the brush to 10%. Very roughly paint in the color where you want it. Be sure to release the mouse every now and then so that the color begins to multiply over itself. Don’t worry about staying in the lines too much. I used a Wacom Tablet so it was easy for me to get nice strokes but if all you have is a mouse just do the best you can.

Step Five:

Hit E for the Eraser Tool. Set the eraser brush up the same way that we did the paint brush. Make sure that the eraser brush’s Opacity is at 50%. Now go back and tidy up your paint job. I like it when you can still slightly see the paint going over the lines.

Step Six:

On my image, I want the pants to be blue instead of that peachy color, so I am going to make a new Hue/Saturation Adjustment layer at the very top of the layers palette. Drag the Hue slider over until you get the hue that you like. Adjust the saturation as you like. Wait, the whole image changed! Thats Ok — we are going to fix that.
Click on the layer mask thumbnail on the Hue/Sat layer and hit Cmd+I to invert it. The image will go back to the way it was before. Set your background color to white and select the Eraser Tool. Set the eraser’s opacity to 100% and paint on the mask so that the hue adjustment we made appears. Now just paint where you want the color shift.
Continue this way until you are happy with the colors.
The shirt adjusted.
The skin tone adjusted.

Step Seven:

Make one more new blank layer just below the "Paint" layer. Call it "bkg paint". Select the brush tool again and make the master diameter huge. Mine is at 200. With the brush opacity at 5% do a few really broad strokes across the whole image just to bring in a little color to the background.

Monday, August 1, 2011

Animation in Photoshop

Digital Human


1. Creat new document, size 400 x 600 px.
2. Creat new Guide like this
3. Use pen draw this path, name that "1"
4. Draw again, name that "2"


5. "3"
6. "4"
7. "5"


8. "6"
9. "7"
10. "8"


11. "9"
12. "10"
13. "11"


14. "12"


15. use Type Tool, 20 pt click in 1 > 12 and type random text, then Rasterize
all text, and you have 12 layer, đặt tên chúng từ 1 > 12 theo thứ tự từ dưới lên

Layer shot


16. Bring all to Image Ready ....

17. Hide all layer, add 11 frame, that all 12 frame

In frame 1, u unhide layer 1 ,inframe 2 , u unhide frame 2, do the same step
to frame 12.


Animation pattlet shot


17. Done !!! Cool idea ++ This is digital human go forward and go
backward


Note : you can type text with a smaller size, it 'll fit your type area and
for the best result :)