Friday, March 2, 2012
How to make anime Girl in photoshop
Learn how to draw a picture of a girl in the anime style.
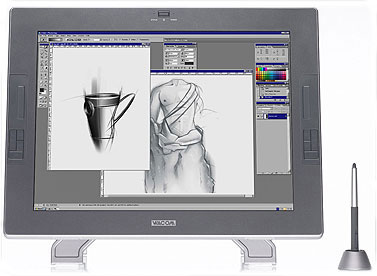
The next lesson we’ll try to represent a girl in the Anime style. We need for this operation a graphical plane-table, an example of which is indicated below

Open a new file with 1024×768 px.
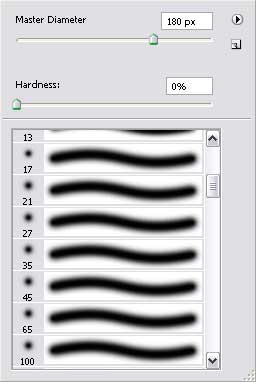
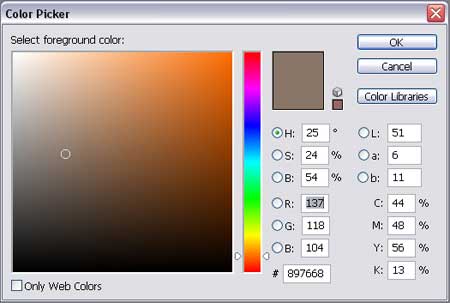
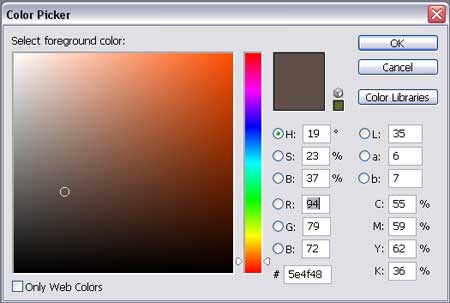
Select after that a smooth brush and, setting the Opacity on 10%, having approximately the same parameters as in the next picture.
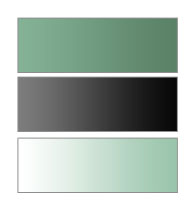
Choose any nuance of blue color it’s appropriate for you:

And represent the background, doing it very smoothly:

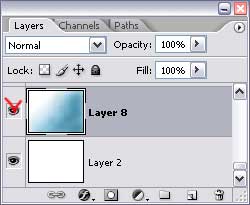
Hide the next option Indicates Layer Visibility on the layers’ panel just for the background not to hinder us when drawing different elements:
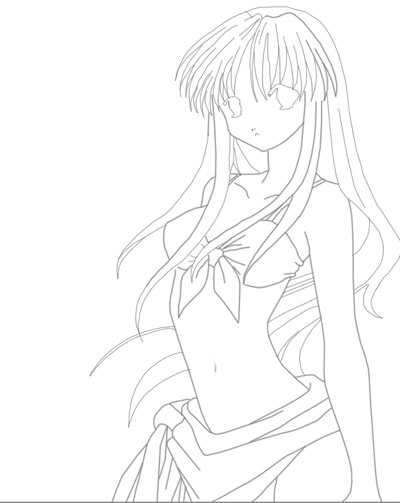
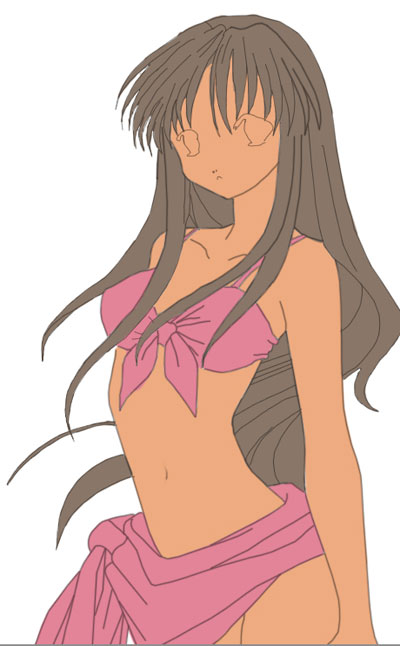
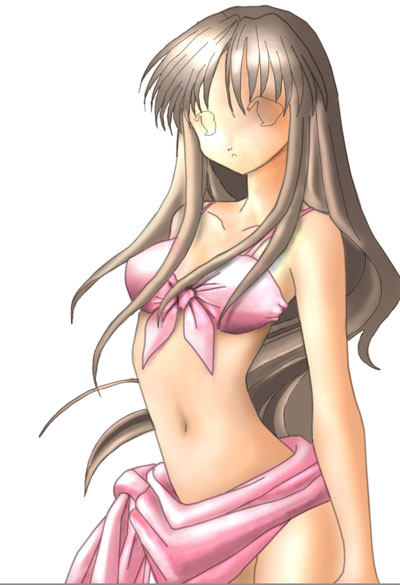
Represent the girl’s contours on a new transparent layer, applying the Pen Tool.
Select a rough brush on a new layer, situated under the girl’s contours to start drawing some girl’s body’s zones:
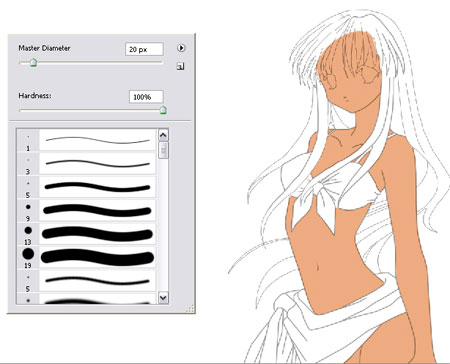
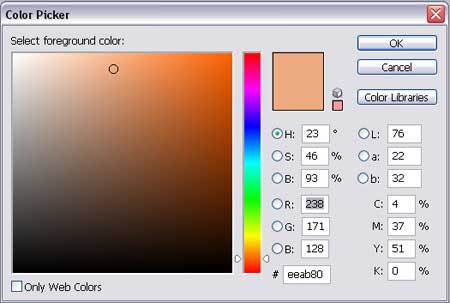
You have the body’s color next:
Paint out on a new layer the girl’s clothes:
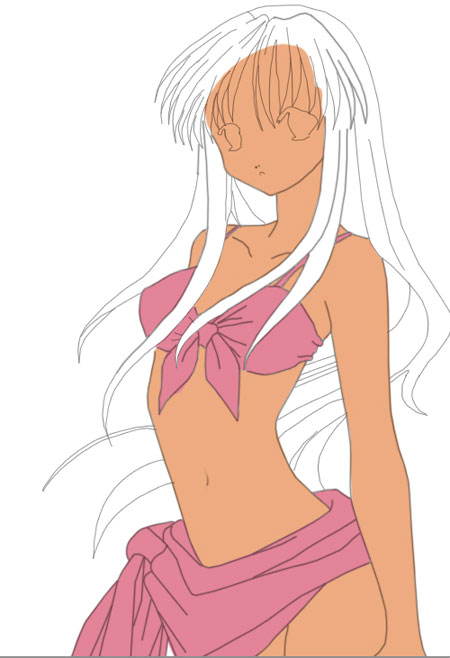
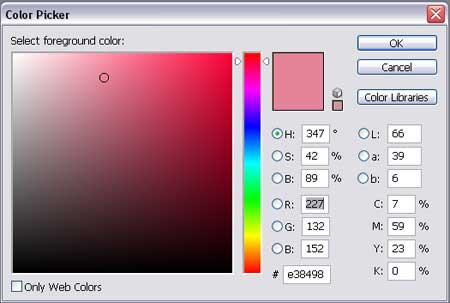
Select a color of red nuance:
We have to process the hair now:
The hair’s color should be this one:
Start painting the body. Select for this operation a smooth brush used on that layer containing the body’s color. The next two mentioned instruments will be helpful to give a volume to the body. The Dodge Tool will be useful in representing the flares and the Burn Tool we’ll use for the shadows and the body’s deepings.

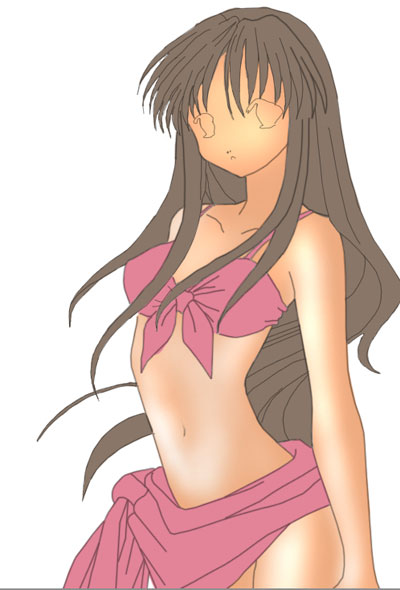
Don’t forget about the shadows of the clothes and the hair’s ones. It will make our drawing look more real:

Applying the Dodge Tool, it’s possible to draw the girl’s swimsuit. Use the mentioned instrument to draw the flares on the girl’s clothes:

Start correcting the hair’s painting. It’s necessary to select a rough brush and paint very accurately the hair’s locks on those places the light falls less:
Use the next shown color for the mentioned processing:
The Dodge Tool will be helpful in representing the flares on the girl’s hair:
Try to make the hair more voluminous also, making its edges sharper:
Represent the girl’s eyes on a new layer:

They may be created with a simple brush and the next color’s nuances:
Make the corrections on the contour, applying the Eraser Tool (E). Set the Opacity on 20% in those places the contour is too sharp. Create a new layer and apply the brush to represent the girl’s eyebrows:
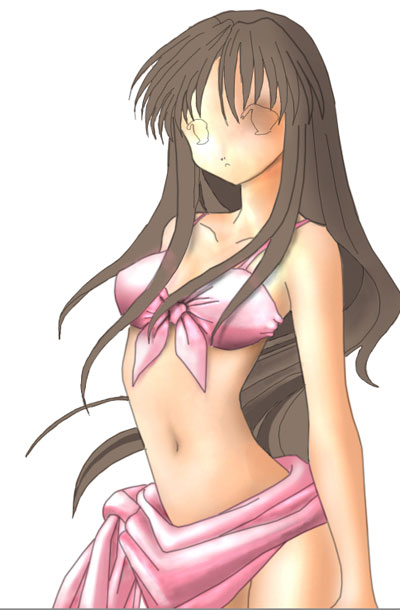
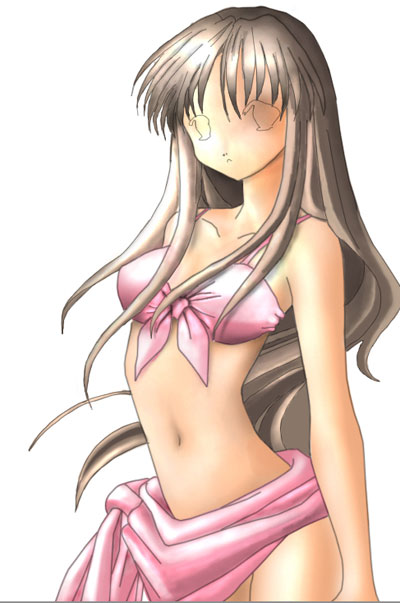
Make visible gain the background:
The picture is finished!
The next lesson we’ll try to represent a girl in the Anime style. We need for this operation a graphical plane-table, an example of which is indicated below
Open a new file with 1024×768 px.
Select after that a smooth brush and, setting the Opacity on 10%, having approximately the same parameters as in the next picture.
Choose any nuance of blue color it’s appropriate for you:
And represent the background, doing it very smoothly:
Hide the next option Indicates Layer Visibility on the layers’ panel just for the background not to hinder us when drawing different elements:
Represent the girl’s contours on a new transparent layer, applying the Pen Tool.
Select a rough brush on a new layer, situated under the girl’s contours to start drawing some girl’s body’s zones:
You have the body’s color next:
Paint out on a new layer the girl’s clothes:
Select a color of red nuance:
We have to process the hair now:
The hair’s color should be this one:
Start painting the body. Select for this operation a smooth brush used on that layer containing the body’s color. The next two mentioned instruments will be helpful to give a volume to the body. The Dodge Tool will be useful in representing the flares and the Burn Tool we’ll use for the shadows and the body’s deepings.
Don’t forget about the shadows of the clothes and the hair’s ones. It will make our drawing look more real:
Applying the Dodge Tool, it’s possible to draw the girl’s swimsuit. Use the mentioned instrument to draw the flares on the girl’s clothes:
Start correcting the hair’s painting. It’s necessary to select a rough brush and paint very accurately the hair’s locks on those places the light falls less:
Use the next shown color for the mentioned processing:
The Dodge Tool will be helpful in representing the flares on the girl’s hair:
Try to make the hair more voluminous also, making its edges sharper:
Represent the girl’s eyes on a new layer:
They may be created with a simple brush and the next color’s nuances:
Make the corrections on the contour, applying the Eraser Tool (E). Set the Opacity on 20% in those places the contour is too sharp. Create a new layer and apply the brush to represent the girl’s eyebrows:
Make visible gain the background:
The picture is finished!
Monday, February 27, 2012
How to make puppete in photoshop
In this tutorial I am going to attempt to show you how to ‘puppetize’ Charlize from this…

…to this! Bear in mind that I used PSPv9 and that this is my first attempt at a tutorial!!!

Use this tutorial in conjunction with Jobigoud's mini-tut on joints: http://www.worth1000.com/stories/thread.asp?cid=29&eid=219537
The first step is to use your smudge brush at about 46% opacity and smooth out her skin, hair and teeth until they have a plastic look to them.
Now draw some oval shapes in the darker skin tones and place them on her joints…look at the angles of her joints to help you with the placing. Just keep adjusting them until they look right. Notice that I have some darker ovals and some lighter ovals…the lighter ovals are placed where I thought more light would fall.

Using the pen tool, draw in your strings….and there you have it…all done!!! Good luck.

…to this! Bear in mind that I used PSPv9 and that this is my first attempt at a tutorial!!!
Use this tutorial in conjunction with Jobigoud's mini-tut on joints: http://www.worth1000.com/stories/thread.asp?cid=29&eid=219537
The first step is to use your smudge brush at about 46% opacity and smooth out her skin, hair and teeth until they have a plastic look to them.
Now draw some oval shapes in the darker skin tones and place them on her joints…look at the angles of her joints to help you with the placing. Just keep adjusting them until they look right. Notice that I have some darker ovals and some lighter ovals…the lighter ovals are placed where I thought more light would fall.
Where you only have one oval on a joint, eg, the neck/chin, shoulders, elbows and wrists, you have to copy and paste these joints from your background over the top of your ovals and then erase as much as is needed until it looks as though there is a gap between the joint and the oval.
Now go to your background layer and using your clone tool, get rid of the bits of knee etc that you can still see behind the ovals.

After cloning, this is how your joints should look.
Now using your pen tool, draw in the lines that hold the joints together. I added a shadow to the knee lines for more effect.

Here you need to blacken her mouth and move her chin and lower lip down to give the full puppet effect. I also drew in two faint brown lines to define her chin/jaw more.

Next I airbrushed a lighter skin tone onto all of her body and gaussian blurred it until it looked right (you will have to play with this until you are satisfied with your result). I also added highlights to her hair in the same way. This gave Charlize more of the plastic puppet look that I was looking for.
Now draw in the dots/holes where you would like to attach the strings.

Now go to your background layer and using your clone tool, get rid of the bits of knee etc that you can still see behind the ovals.
After cloning, this is how your joints should look.
Now using your pen tool, draw in the lines that hold the joints together. I added a shadow to the knee lines for more effect.
Here you need to blacken her mouth and move her chin and lower lip down to give the full puppet effect. I also drew in two faint brown lines to define her chin/jaw more.
Next I airbrushed a lighter skin tone onto all of her body and gaussian blurred it until it looked right (you will have to play with this until you are satisfied with your result). I also added highlights to her hair in the same way. This gave Charlize more of the plastic puppet look that I was looking for.
Now draw in the dots/holes where you would like to attach the strings.
Using the pen tool, draw in your strings….and there you have it…all done!!! Good luck.
Friday, February 17, 2012
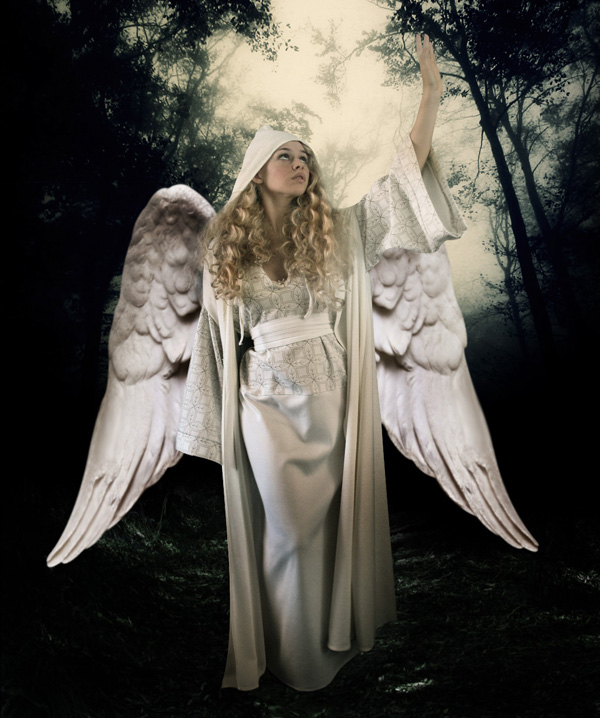
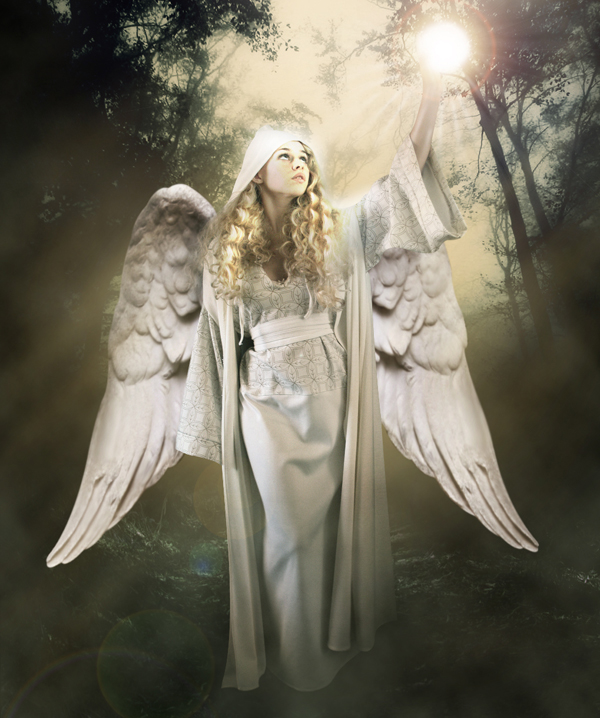
Create a Divine Angel Montage in Photoshop

Materials Needed:
Step 1: Create a new document
First of all open a new document in Photoshop (Dimensions: 1019×1219 px).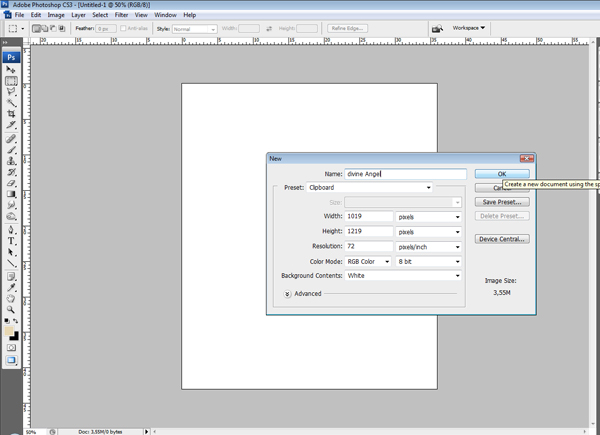
Step 2: Apply Vegetation
Now import the first image “Vegetation1″ that we’ll use to create the background. Resize it and than place it to the top of the page.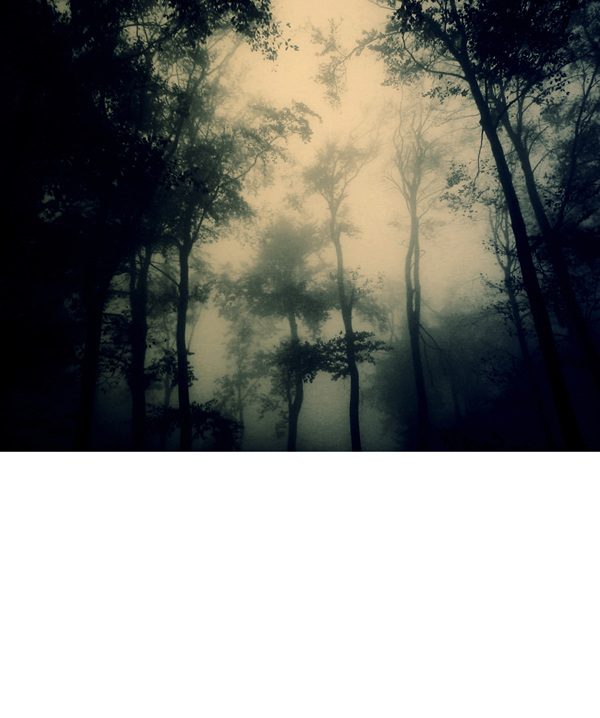
Step 3: Reduce Saturation
Go to Image > Adjustments > Hue/Saturation and reduce the yellow saturation and grow up a little bit the yellow lightness.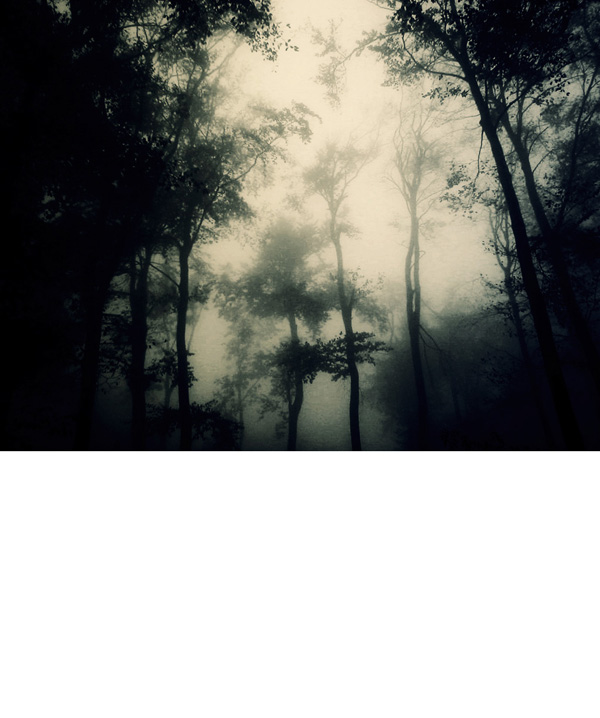
Step 4: Complete the background
Fill the background with black color and erase slowly the bottom part of the image you added so that it will blend in with the black.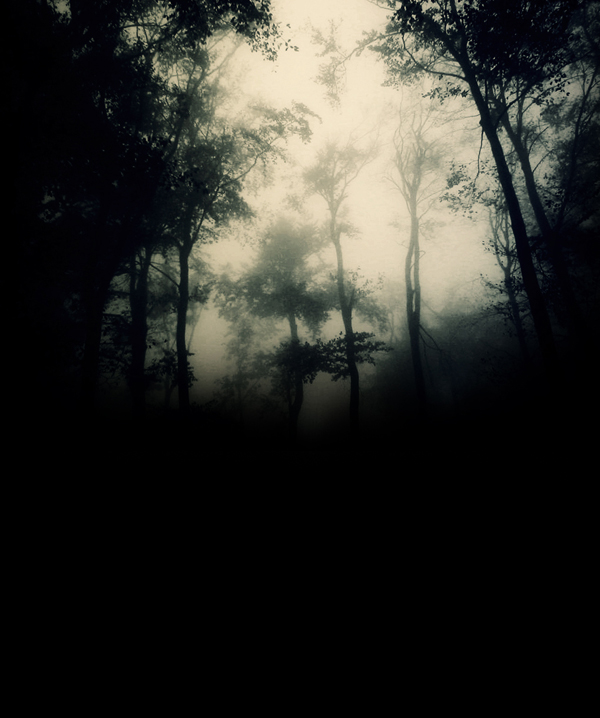
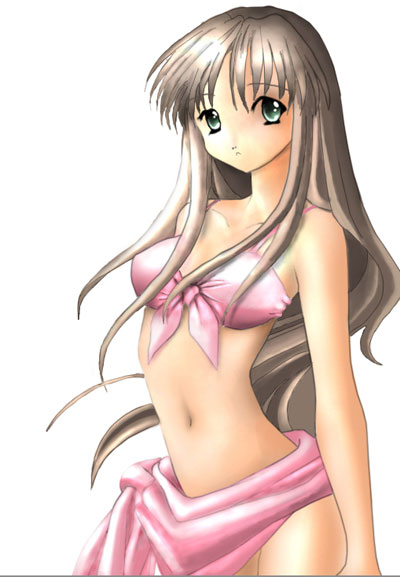
Step 5: Add the main character
Import the second image “Female” resize it and fit it in the centre of the image like below. Change the name of the layer to angel.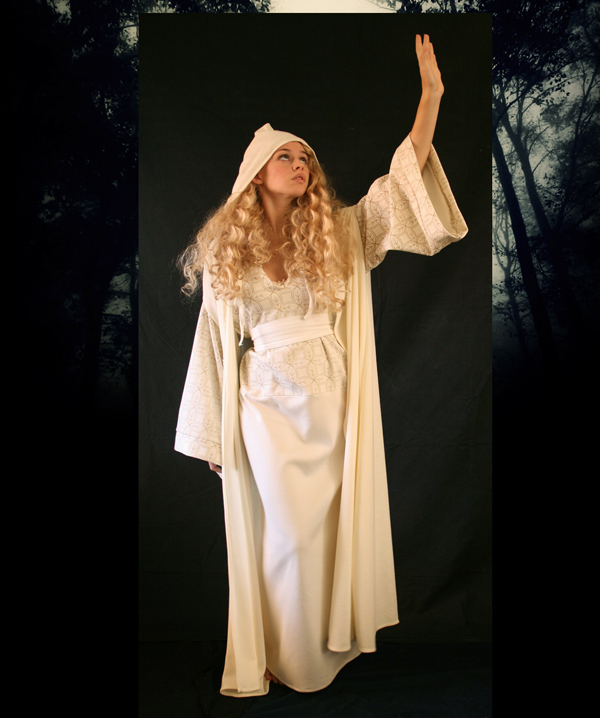
Step 6: Selecting the model
Using the Pen Tool (P) you need to trace the female model and erase the background behind her.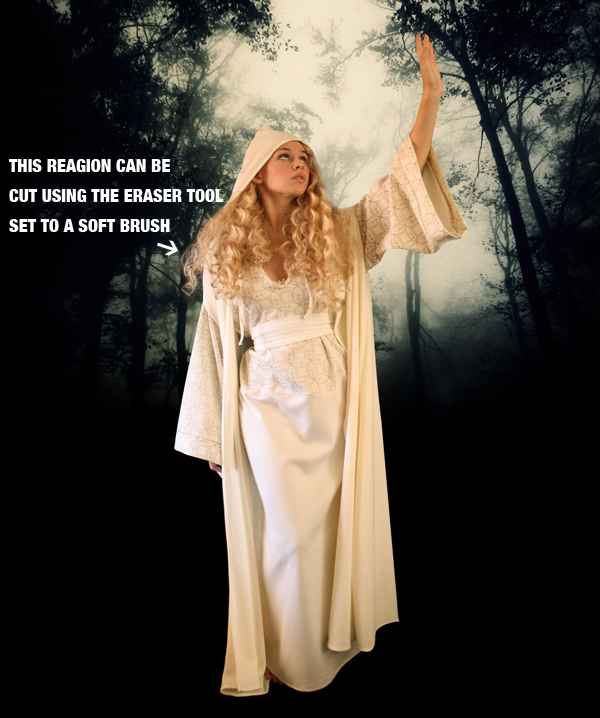
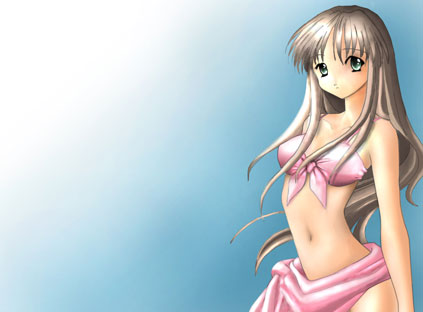
Step 7: Correcting the colors
Go again to Image > Adjustments > Hue/Saturation and reduce the yellow saturation. Than select the Burn Tool (O) and try to make the females dress a bit darker, till you reach a result like the picture below.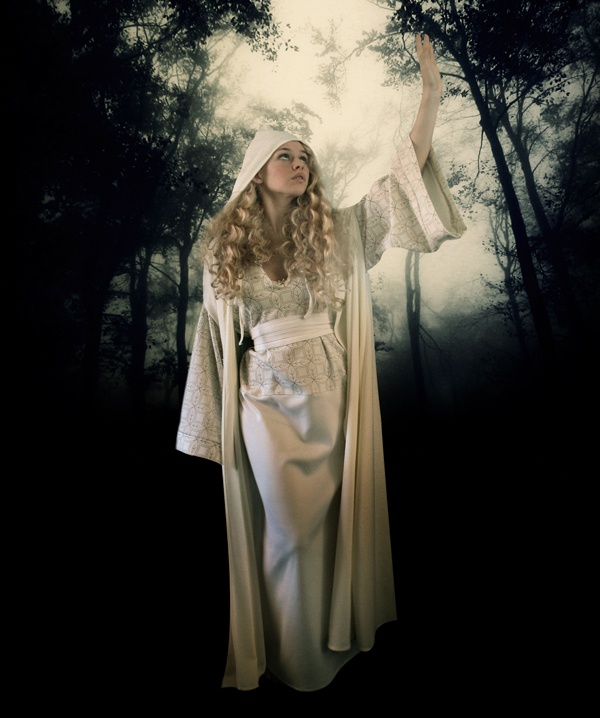

Step 8: Add more detail to the background
Copy and paste the next image we used for the ground Vegetation2 and place it below the angel layer.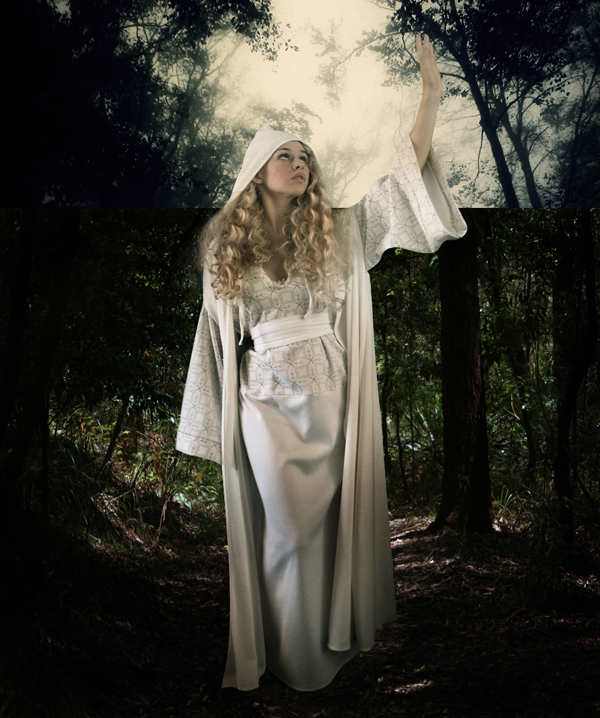
Step 9
Erase the trees from the top of the image, make sure you use a soft brush for this and that you will only have the ground visible and than change the Hue/Saturation and the Color Balance from Image > Adjustments.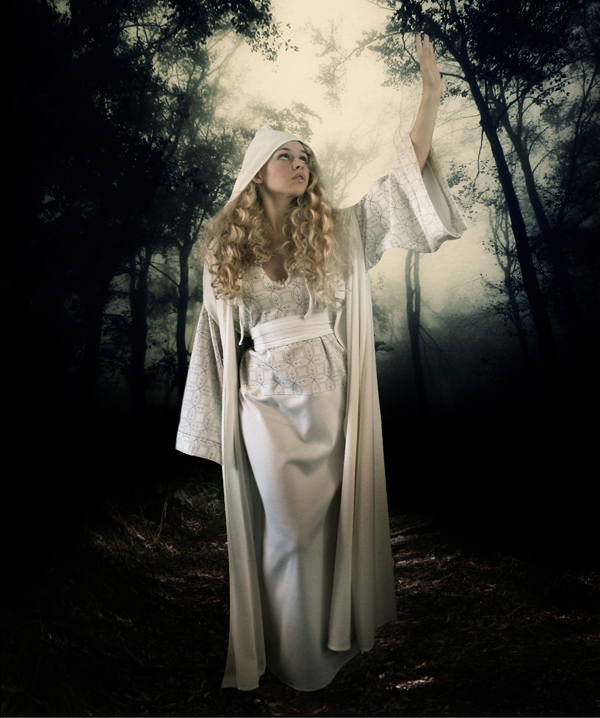
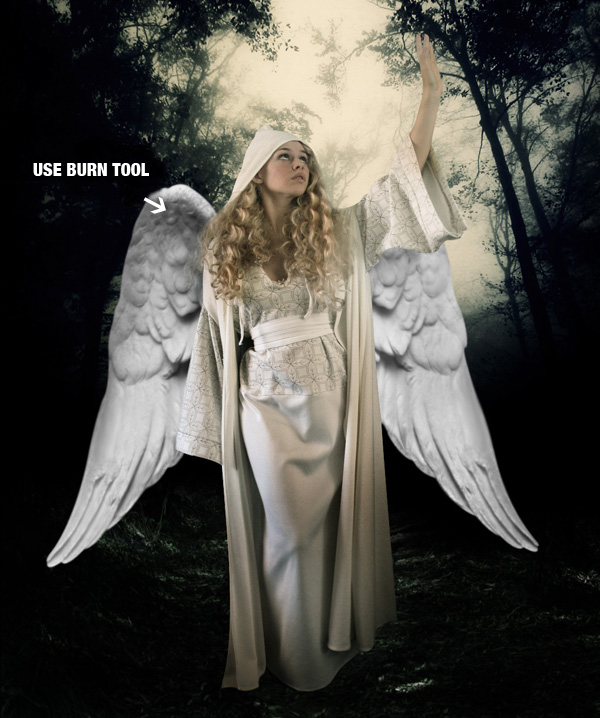
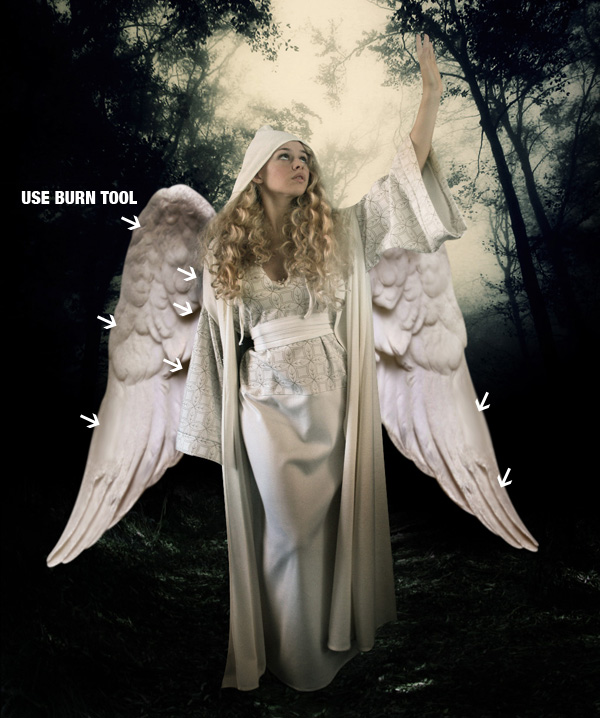
Step 10: Create the angel
Import the image, which contains the wings. Select the contour with the Pen Tool (P) and get rid of the black part of the image. Than use the Burn Tool (O) on the pointed area.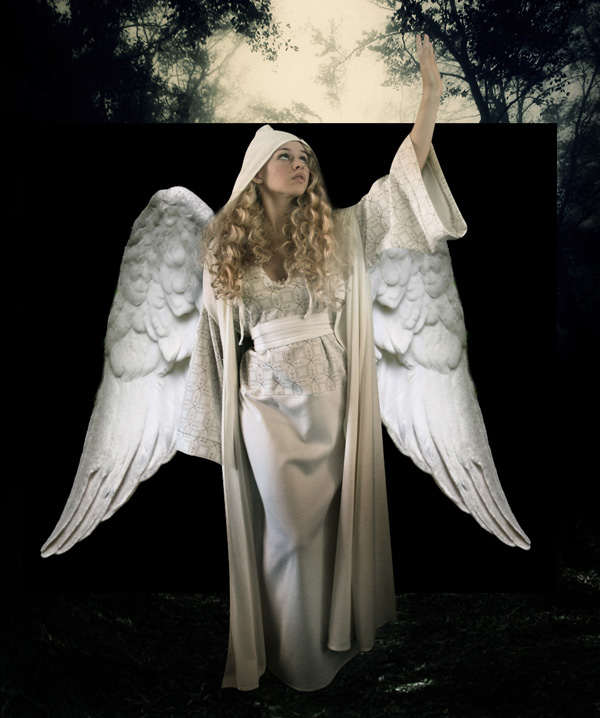
Step 11: Add some color to the wings
Go to Image > Adjustments > Color Balance and use the settings below. Than you can change the contrast from Image > Adjustments > Brightness/Contrast.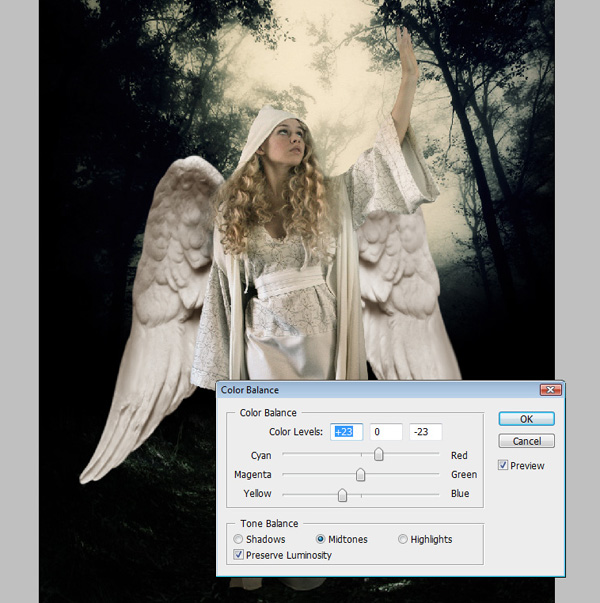
Step 12: Building the star
Create a circle with the Ellipse Tool (U) (Shape Layers). Than go to Filter > Blur > Gaussian Blur, set the radius around 4%.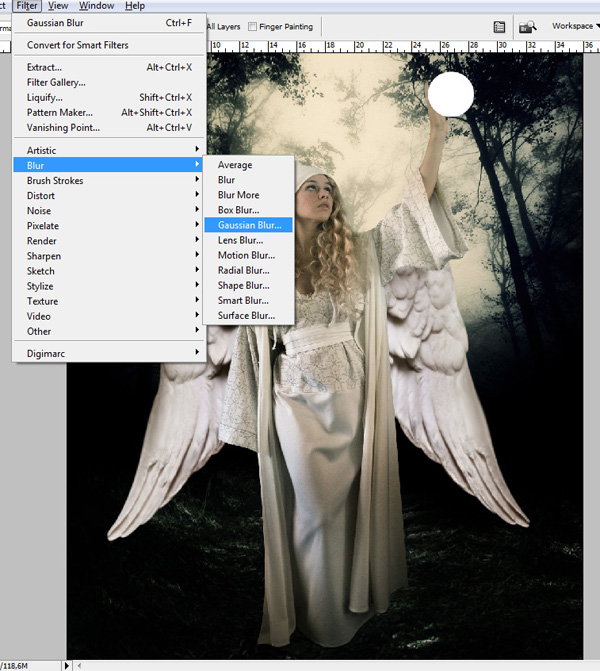
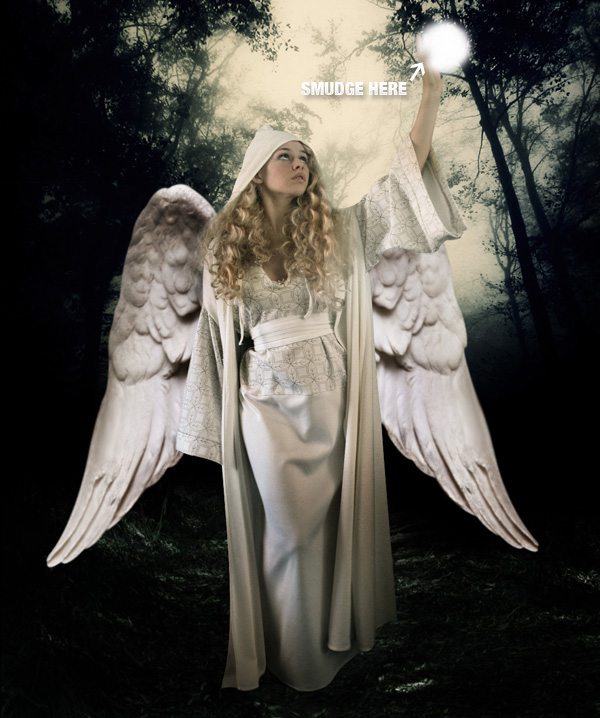
Step 13
Now you should smudge the circle from outside to inside, which will allow the finger be seen. To make it glow, right-click on the layer with the white sphere and go to blending options and use the options from the Outer Glow like below.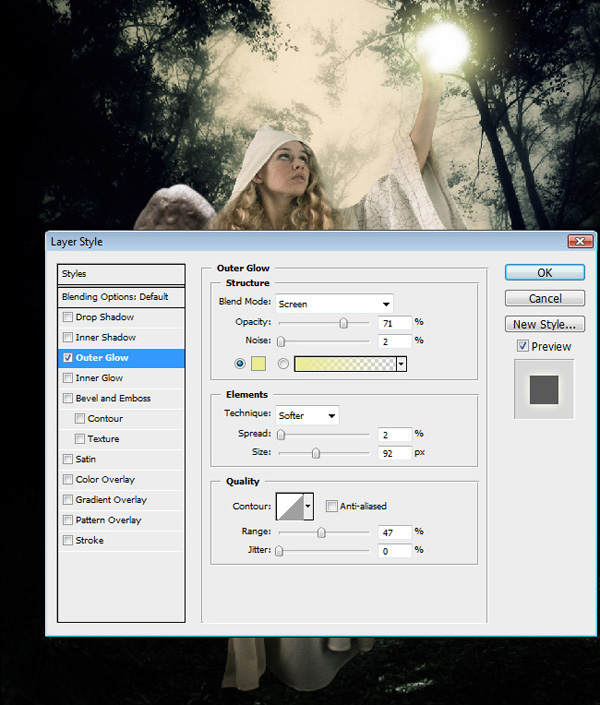
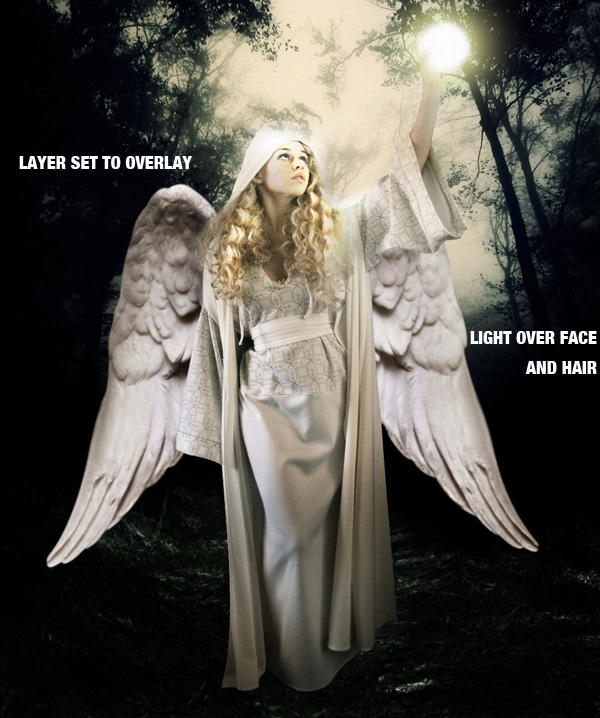
Step 14
The light should go over the face. So you must brush and smudge a white color over the face and the hair then set the layer to Overlay.
Step 15: Creating the star rays
Draw some lines like below and then select with the Elliptical Marquee Tool (M) a circle.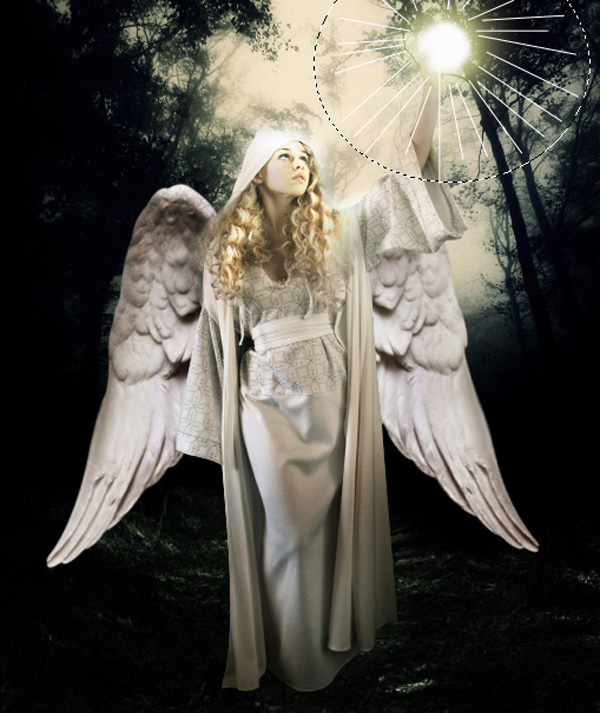
Step 16
Go to Filter > Blur > Radial Blur set to around 15.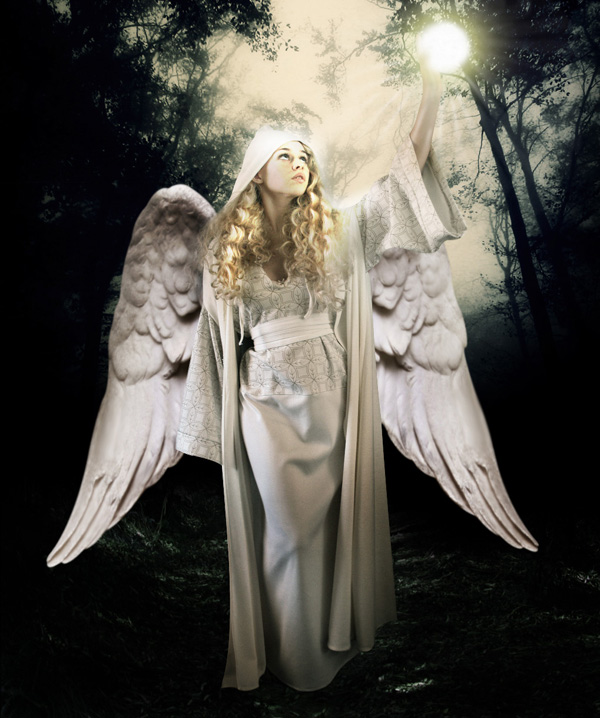
Step 17: Add mist
Create a new layer and fill it with black. Then go to Filter > Render > Clouds. For the colors use these codes: #bfb499 and #000000.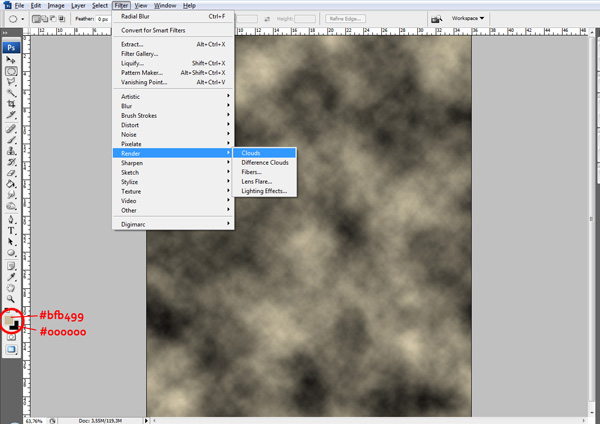
Step 18
Set the mist layer to Screen and Opacity 75%.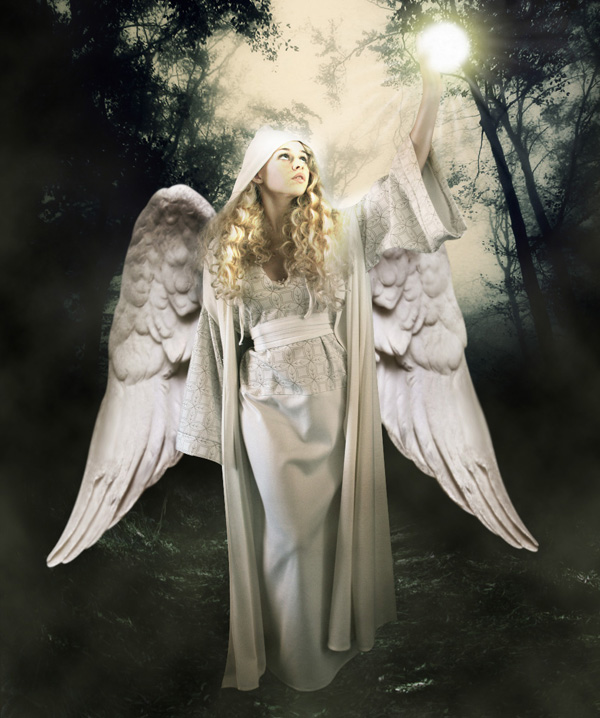
Step 19
Now create a new layer and move it below the clouds layer and add some shadow. Brush with black and then smudge a little bit to cover the legs and the dress.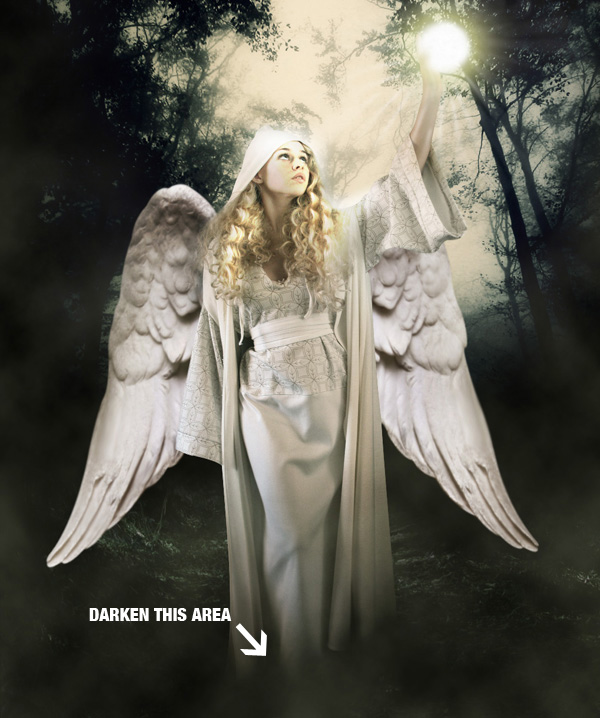
Step 20
In this step you must create some more mist at the female’s feet. Make a selection with the Elliptical Marquee Tool (M) and go to Filter > Render > Clouds. Use the same colors like before.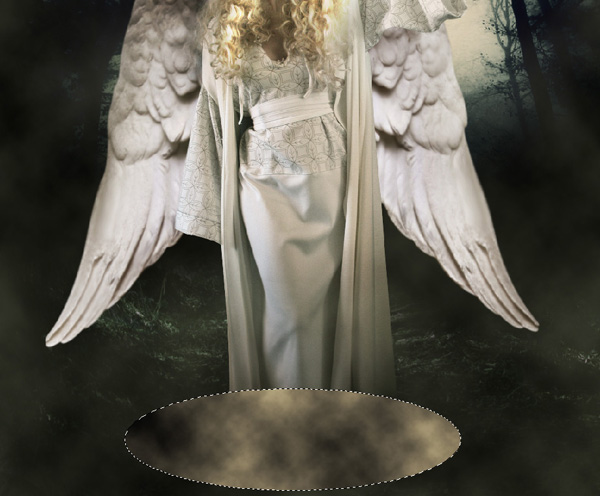
Step 21: Light behind angel
To create the light behind the angel create a new layer below the angel layer and brush it with #dbbe79. Set the layer to screen in the end.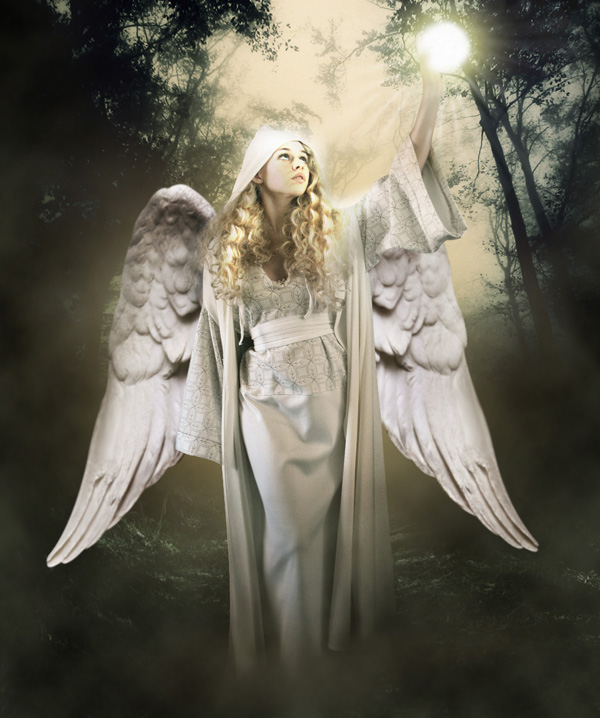
Step 22: Rays of light
Create a new layer then create some straight lines using the Line Tool (U) set to 2px and color #dbbe79.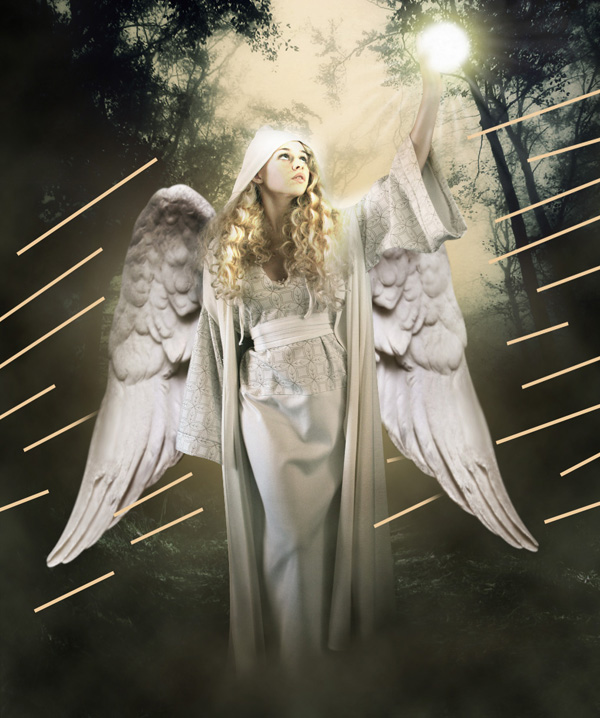
Step 23
Wile still on the rays layer go to Filter > Blur > Gaussian Blur and than Filter > Blur > Motion Blur effect till you get the same result like below.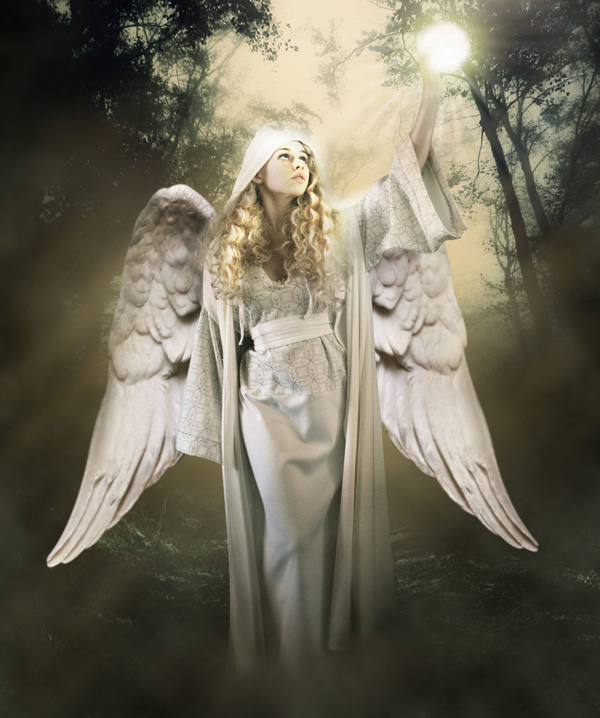
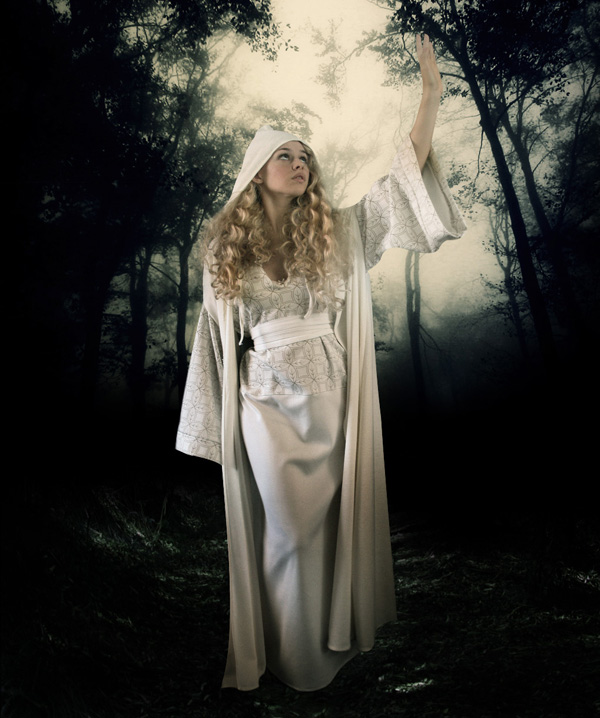
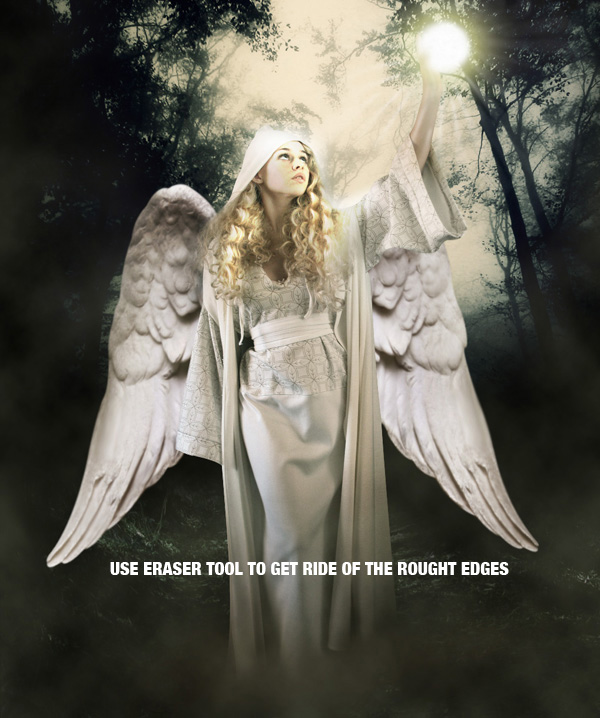
Step 24: Add final light
This is the final step. Select all the layers (Ctrl + A) and copy merged (Shift + Ctrl + C) and paste (Ctrl + P). Then go to Filter > Render > Lens Flare. Using the Erase Tool (E) set to Opacity 70%, you need to slowly erase the lower part of the flare.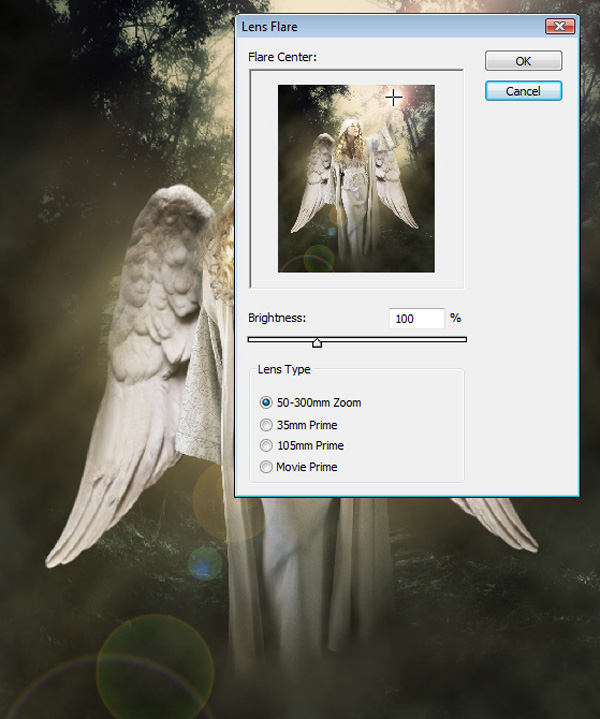
Final Result
Download the PSD
Subscribe to:
Posts (Atom)